When I decided to upgrade from a Tacoma to a Honda Ridgeline, I planned on using my Thule Xsporter Pro racks that I had installed on my Tacoma on the Ridgeline because they are simply the best looking, highest quality and most functional racks available. The Ridgeline is an all-around better mid-size truck than the Tacoma, and putting these racks on the Ridgeline showed yet another reason why – you can actually extend them fully up and down as they are intended to be used, which is not possible on the Tacoma due to bed shape and liner. But surprise, surprise, the Ridgeline has a few challenges of its own when it comes to bed racks. There aren’t many good ones that even fit currently, and the ones that do still require adding custom bed rails, suffer from lack of functionality, don’t look good, or are sold out with no backorder ETA. So if you’ve come to the same conclusion and want to use the Thule Xsporter Pro on your Ridgeline, hopefully these notes will help.
Here are the two unique things I’ve added to my Ridgeline in these photos:
- Thule Xsporter Pro racks
- Unistrut Bed Rail Mount (store, video)- this is not required for the racks, but I had previously installed it in order to provide additional tie down/mounting functionality and can still be used with the racks mounted with a few mods.
It is also worth noting that I also have the OEM Bed Tonneau Cover (video) and did not need to uninstall any of the mounts (bolted into the bed) in order to accomplish this.
Installing the Thule Xsporter Pro racks
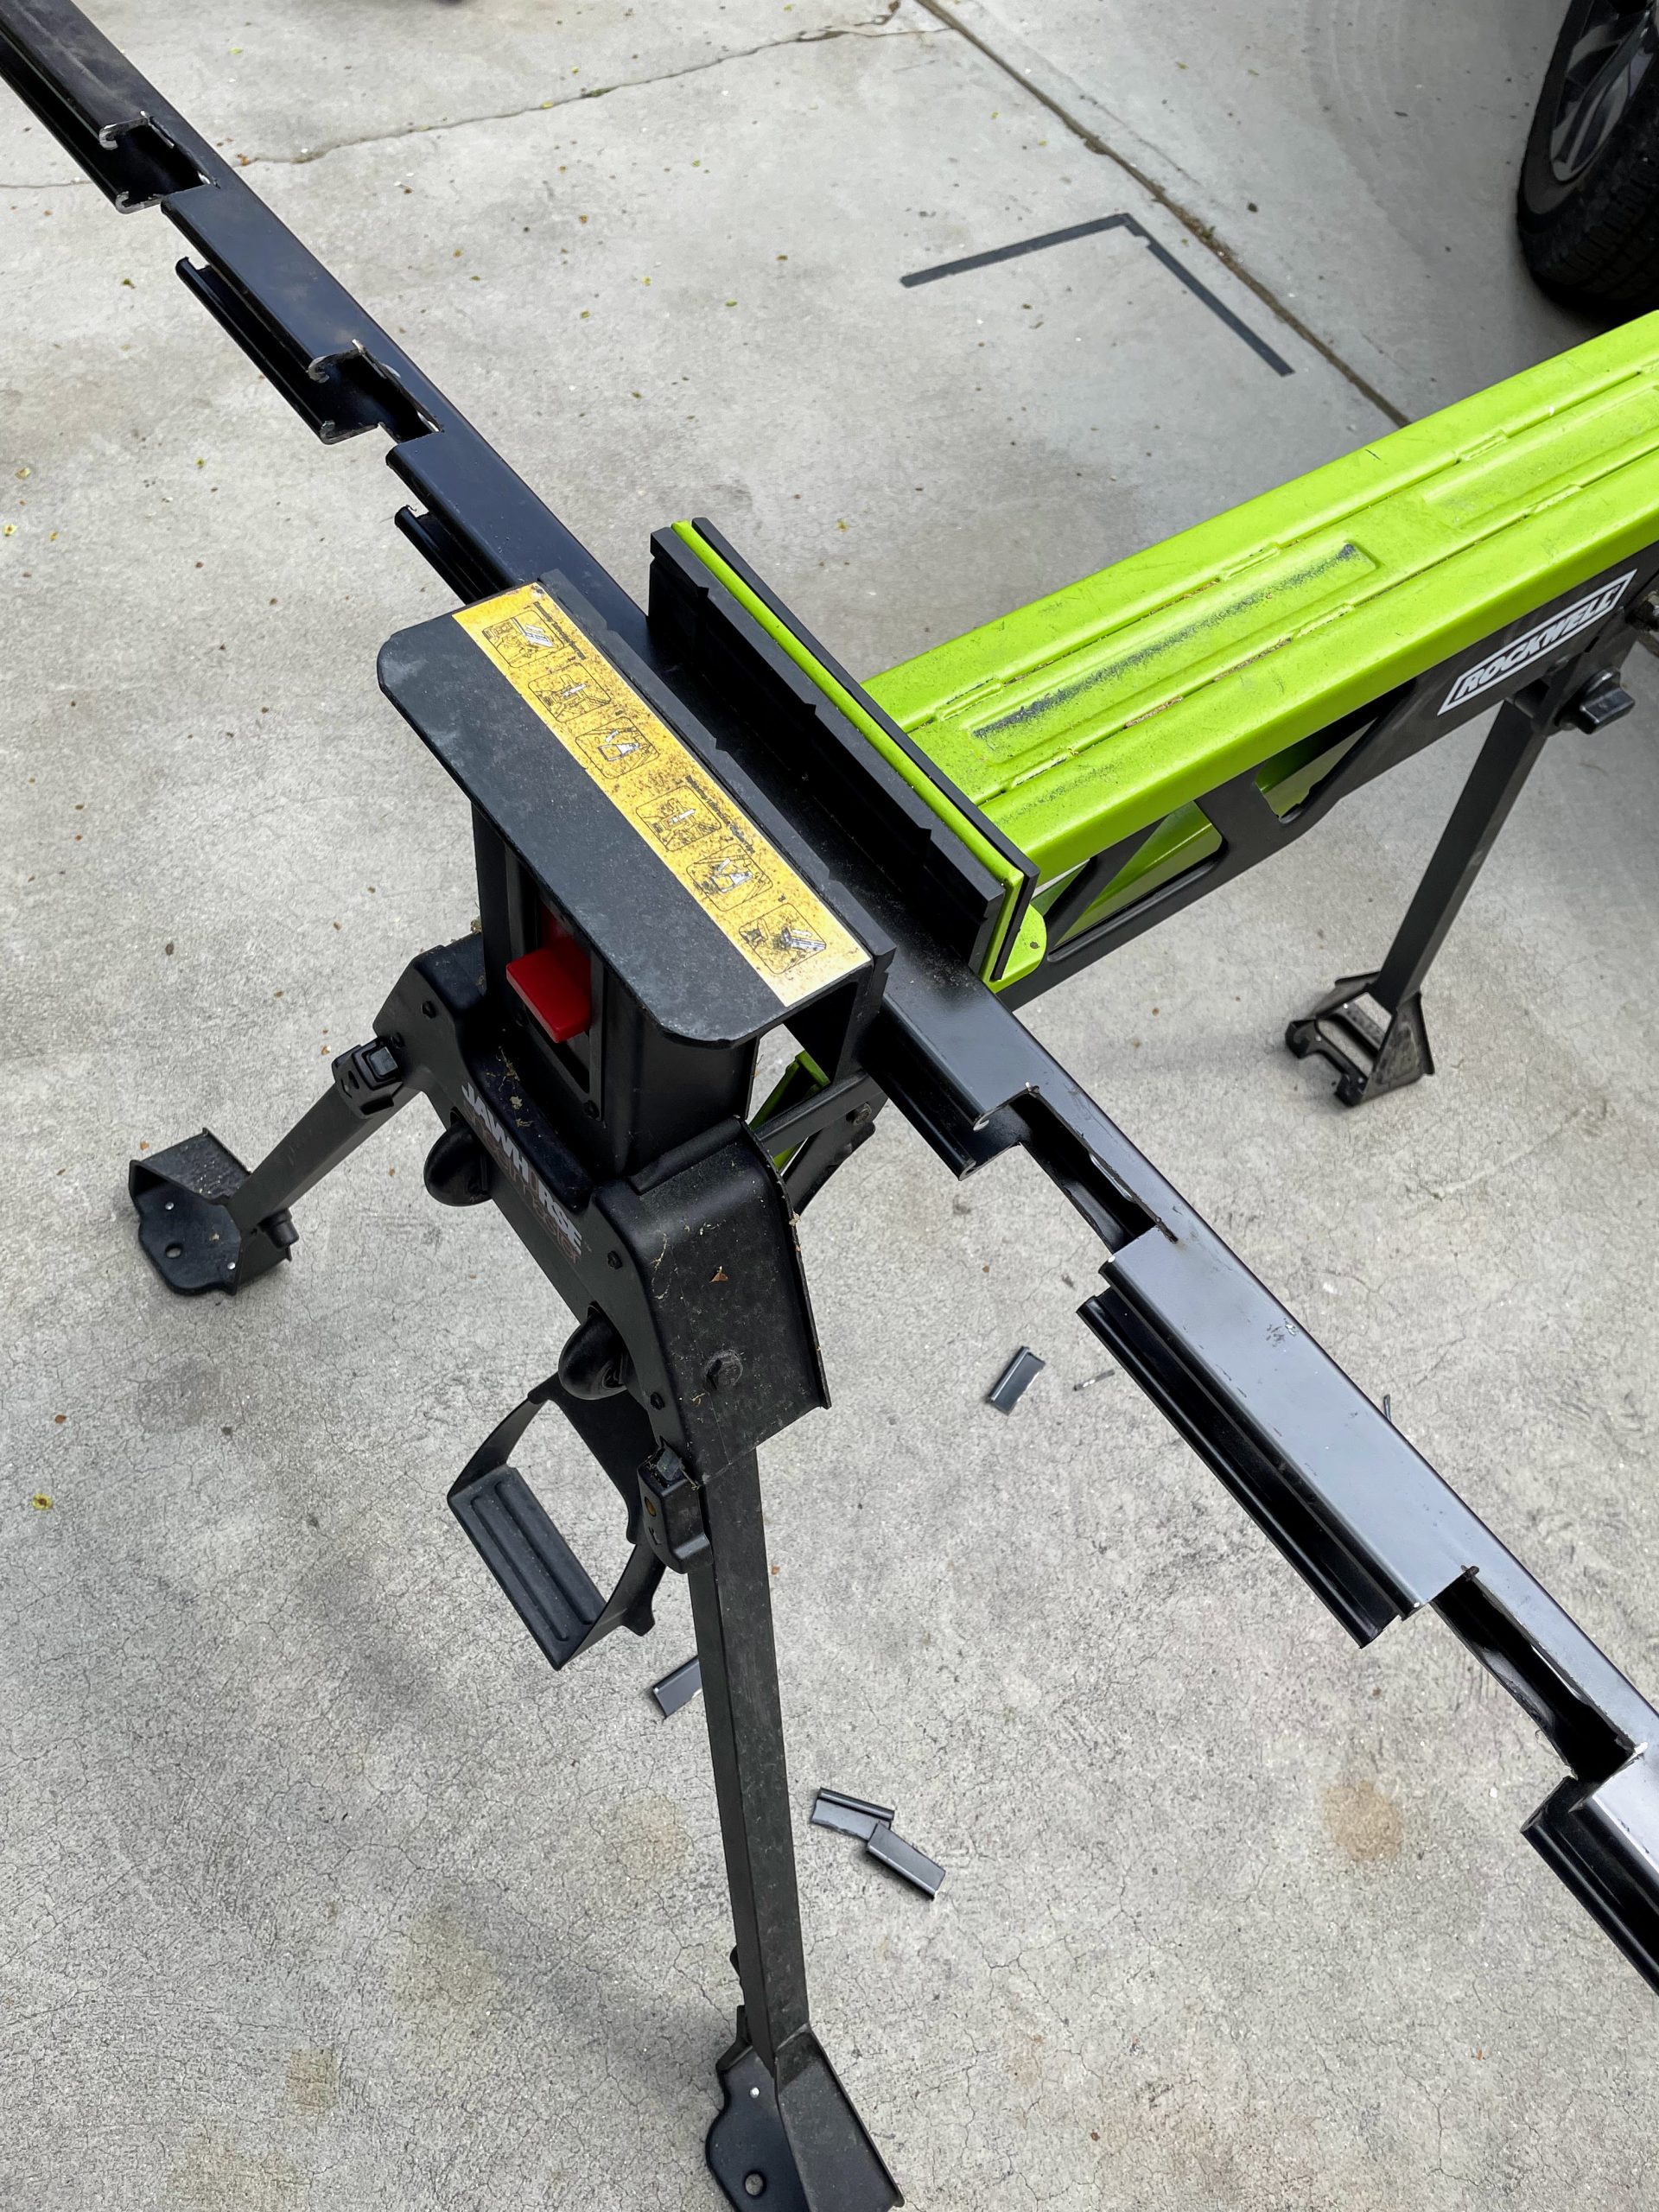
Unfortunately, there are no clamps on the market that are specifically designed for this. I spent days looking online and in stores. In the end, the best solution was right in front of me: modify the adapters that I already had for the Tacoma. The clamps that come with the racks do not work on the Tacoma or the Ridgeline, so you have to purchase these clamps (or these as shown in my photos) that are made specifically for the Tacoma. In order to make them fit the Ridgeline, get out your metal saw. We need to remove the center nubbin from the clamp, which does not weaken the cast aluminum at all:
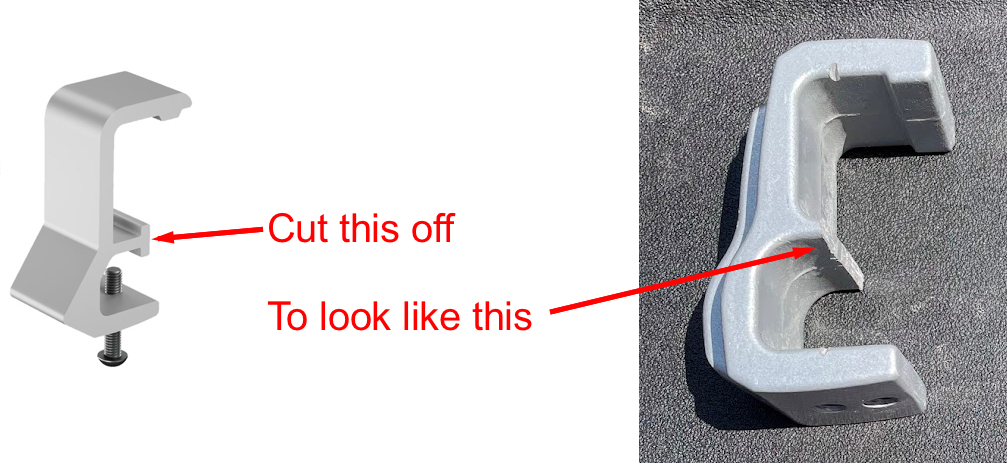
To cut this off I used my Ryobi jigsaw with a long metal blade. Easy cut.
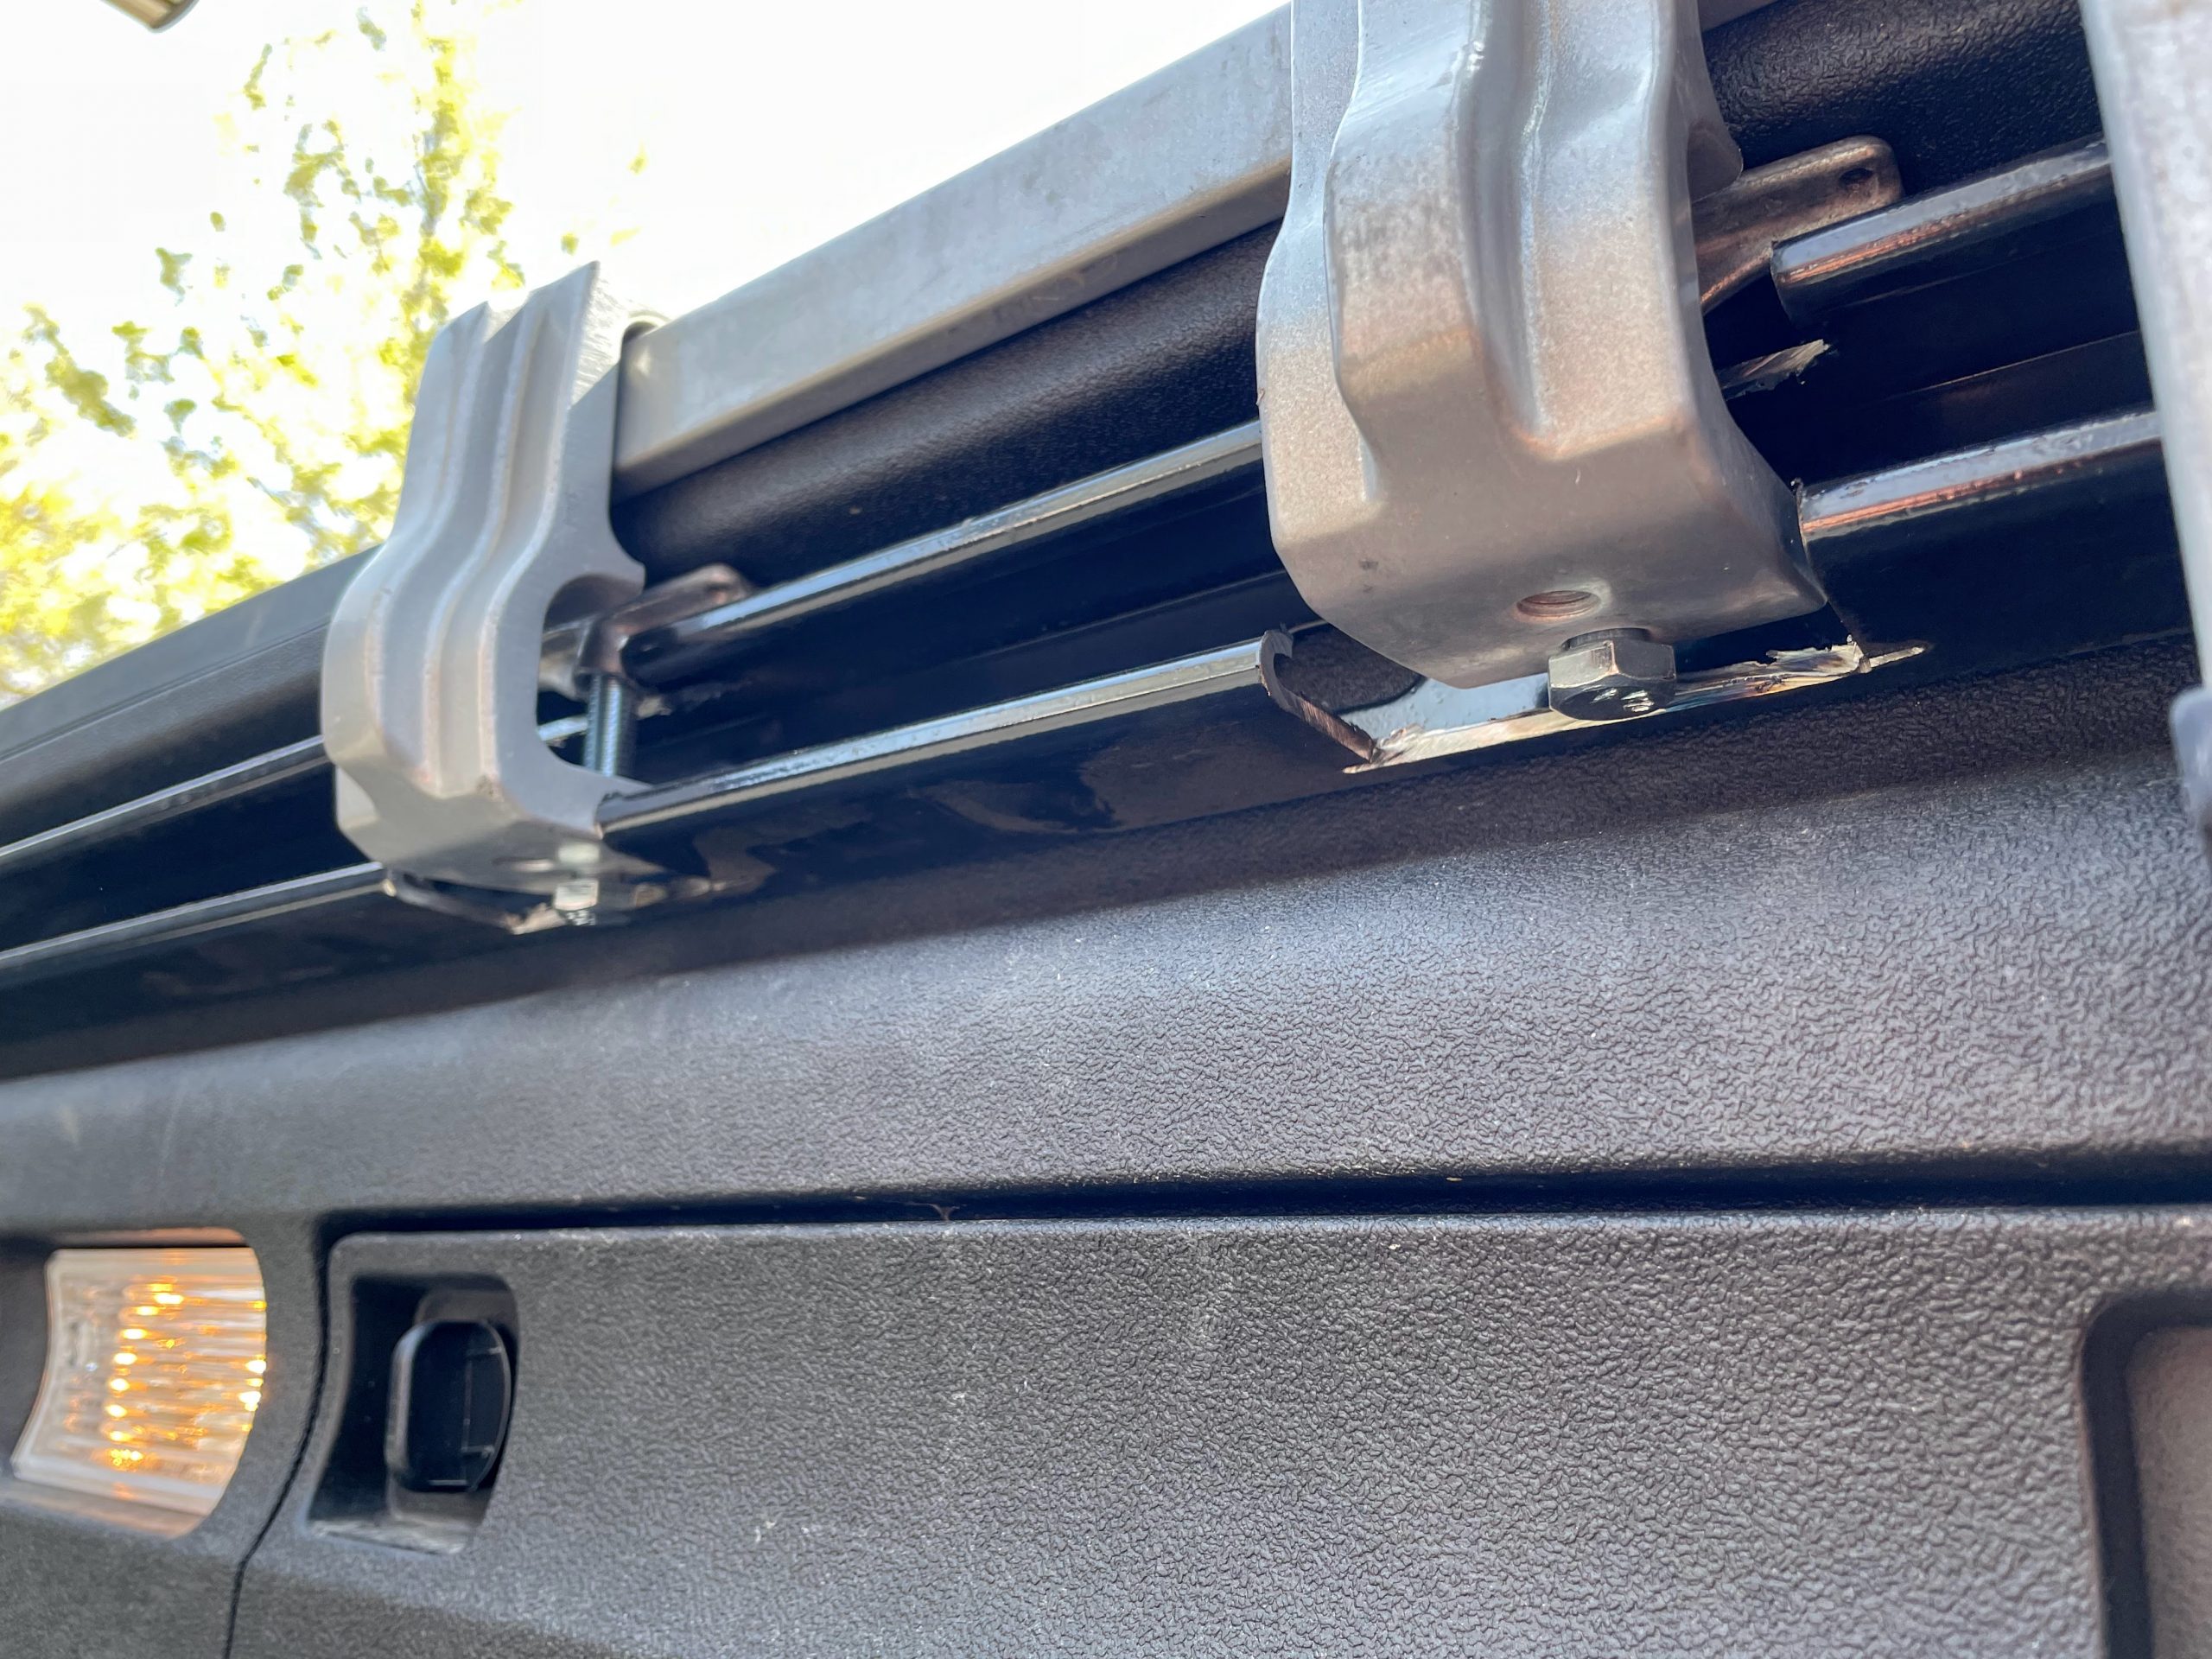
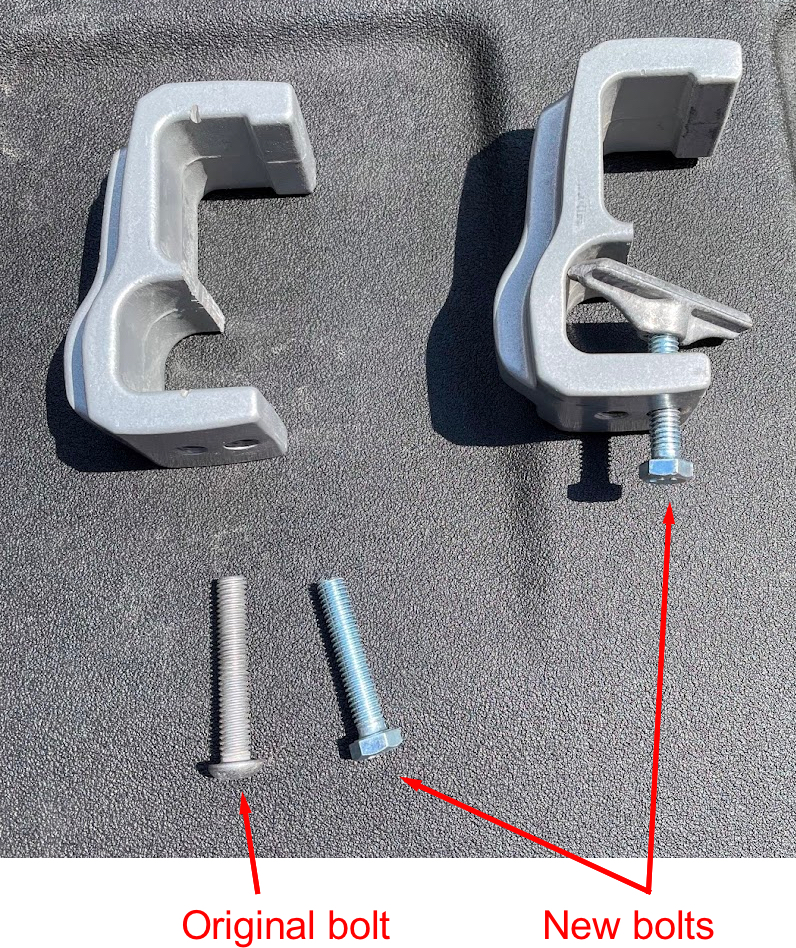
Next you need to drop by a hardware store to get 8 bolts the same thread size but 2″ length with a hex head to replace the bolts that came with the adapters. This is because when you mount it, there is not enough room to get an allen wrench into the original bolts; you need to be able to put a wrench on it and tighten from the side.
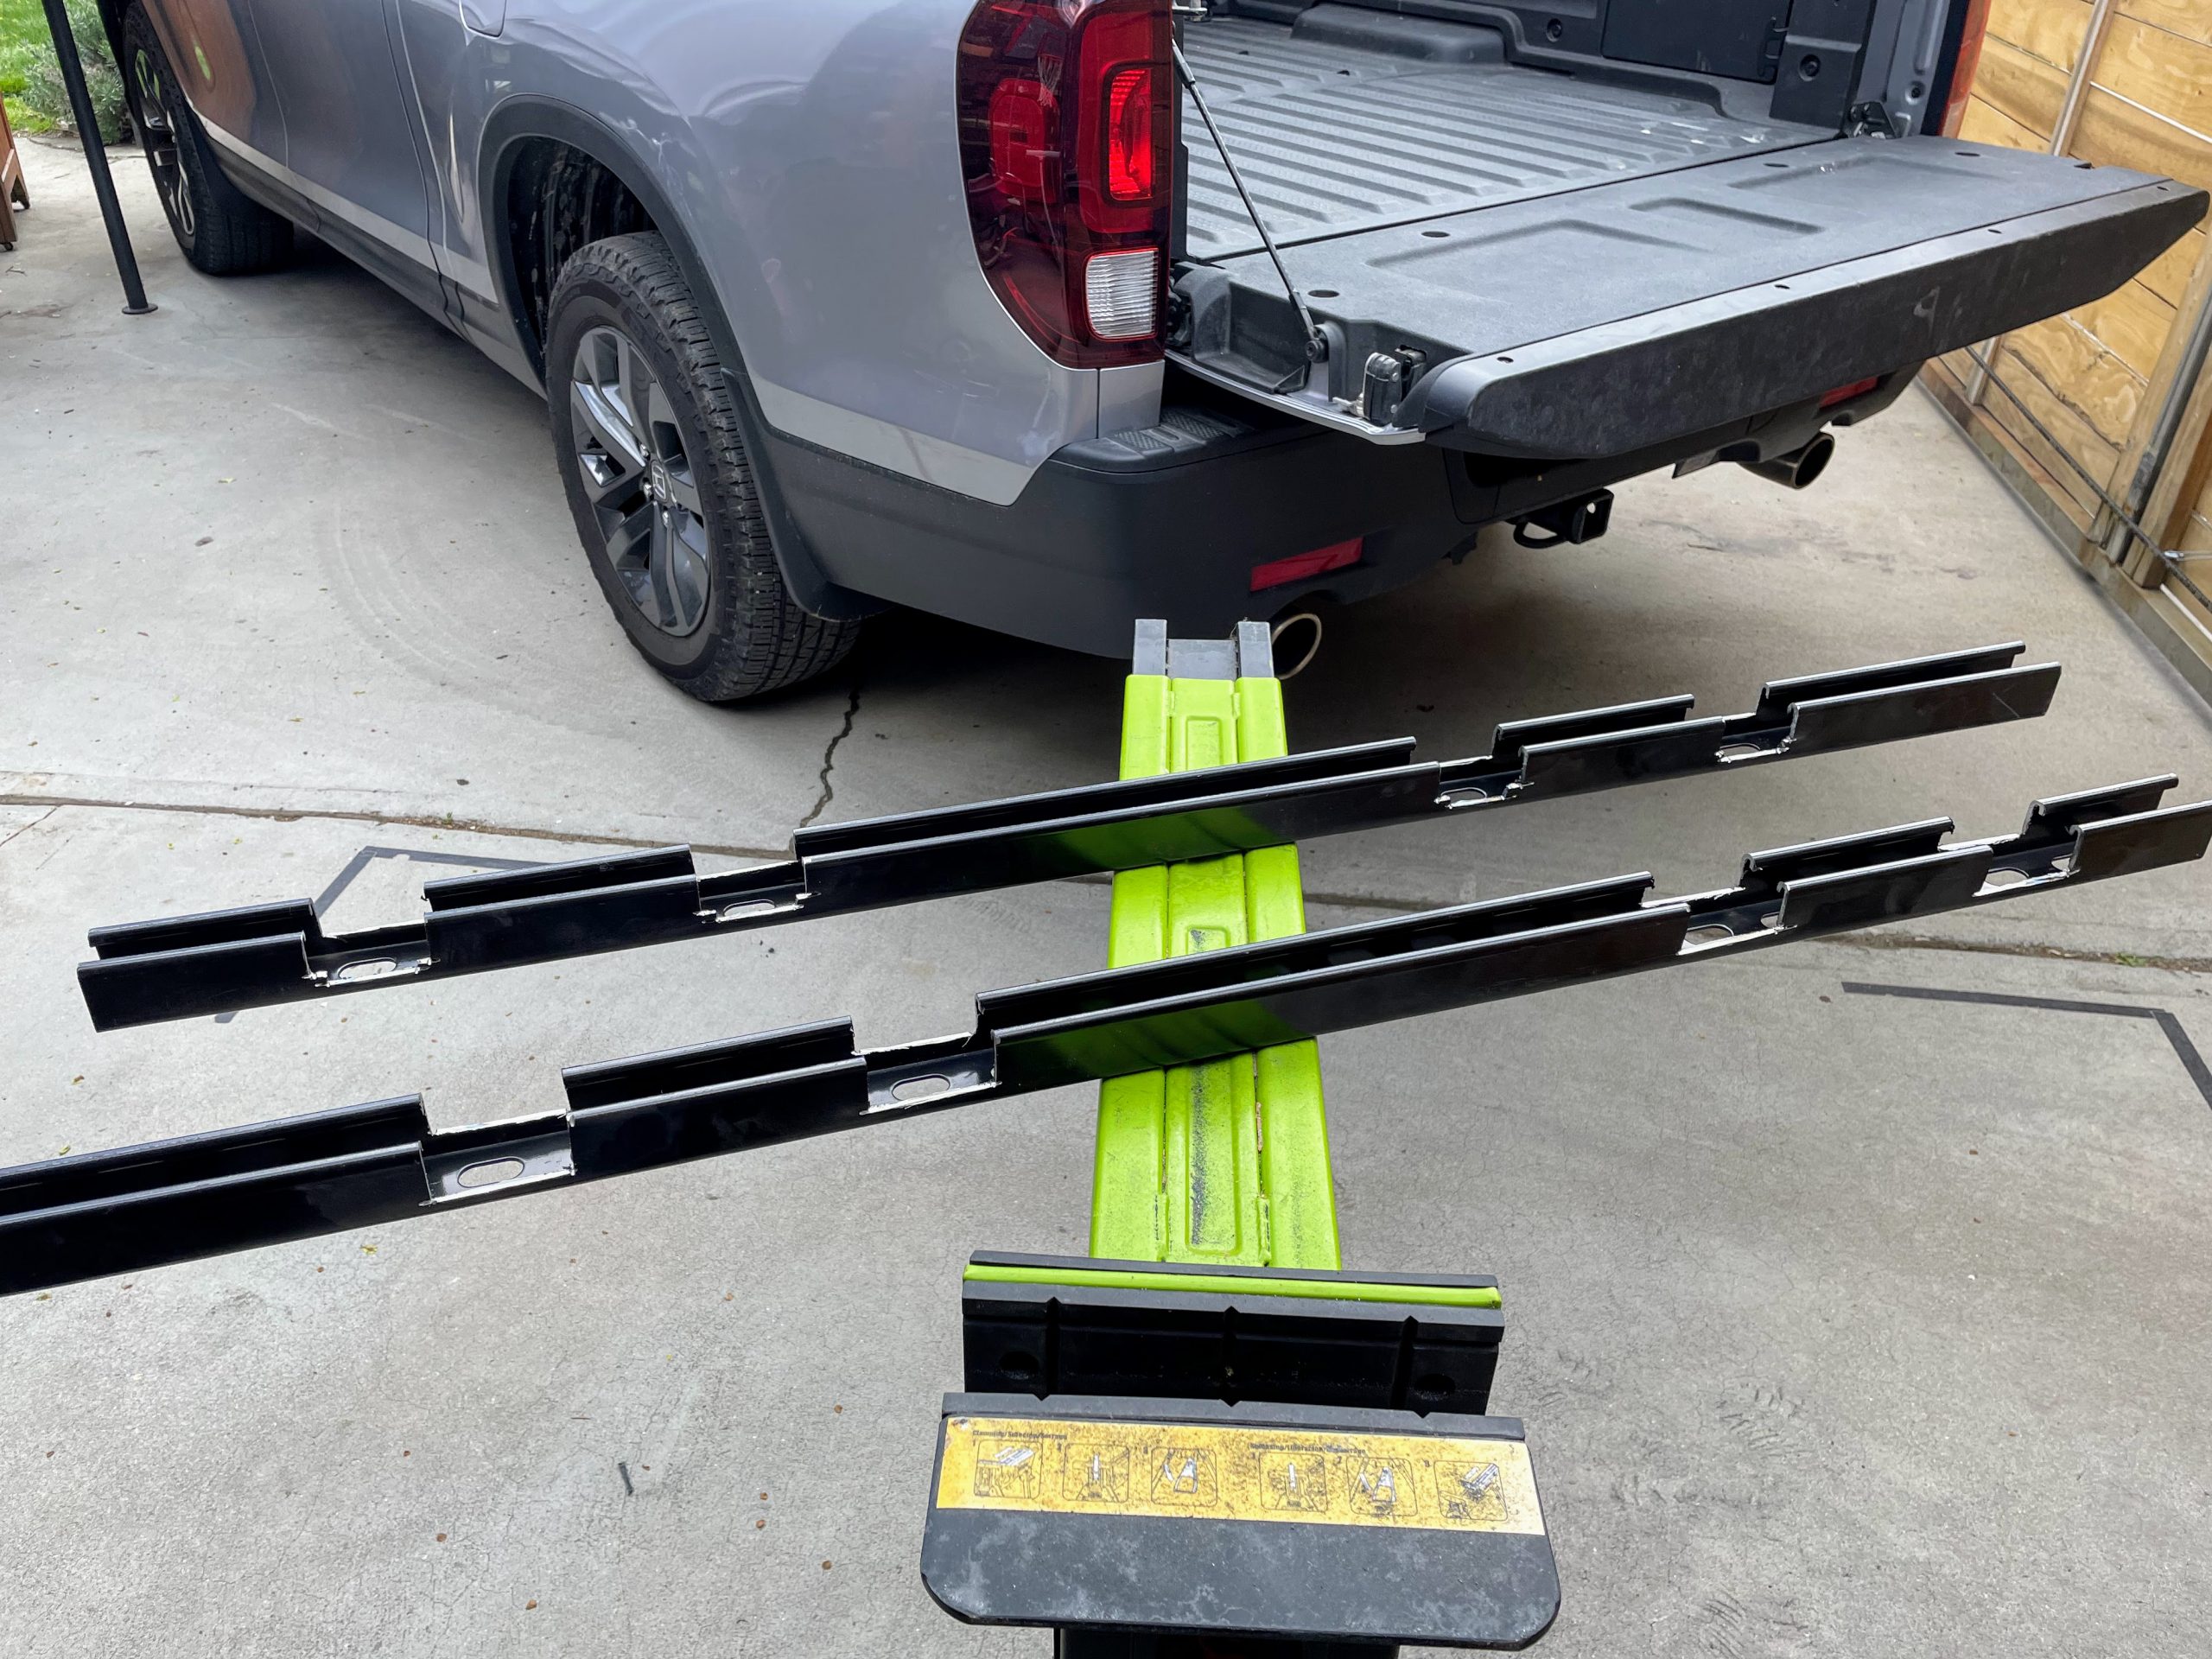
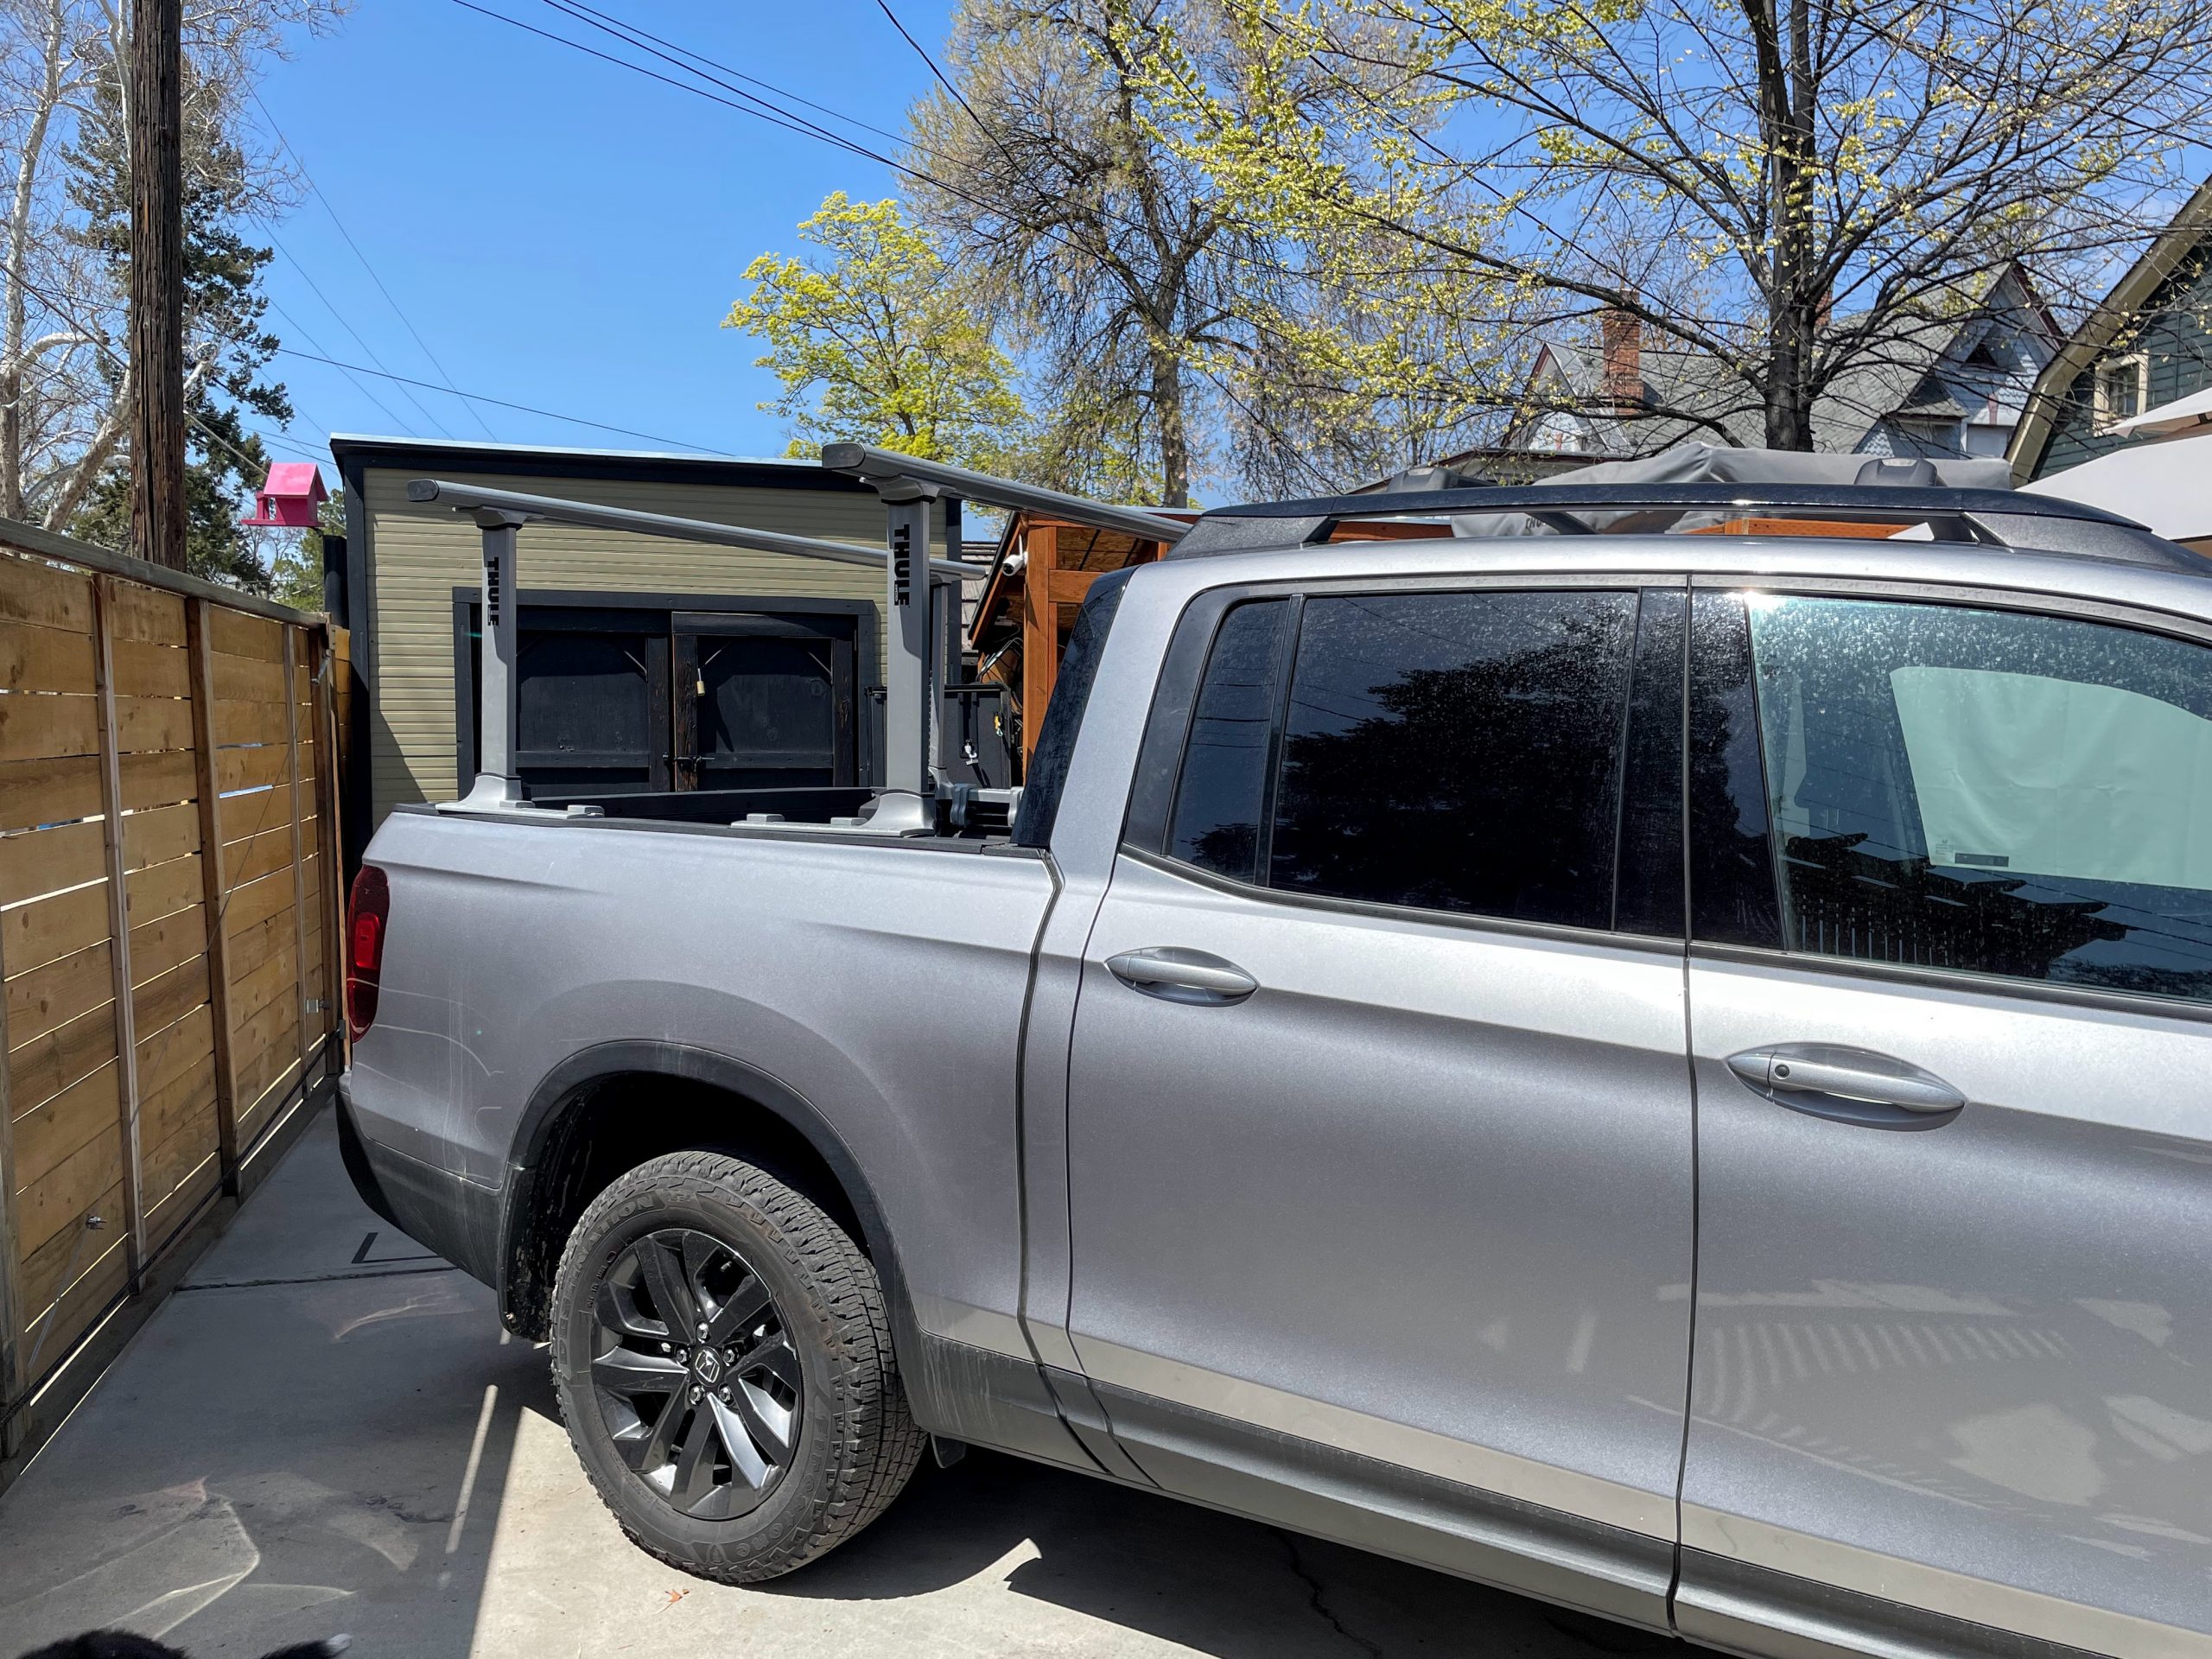
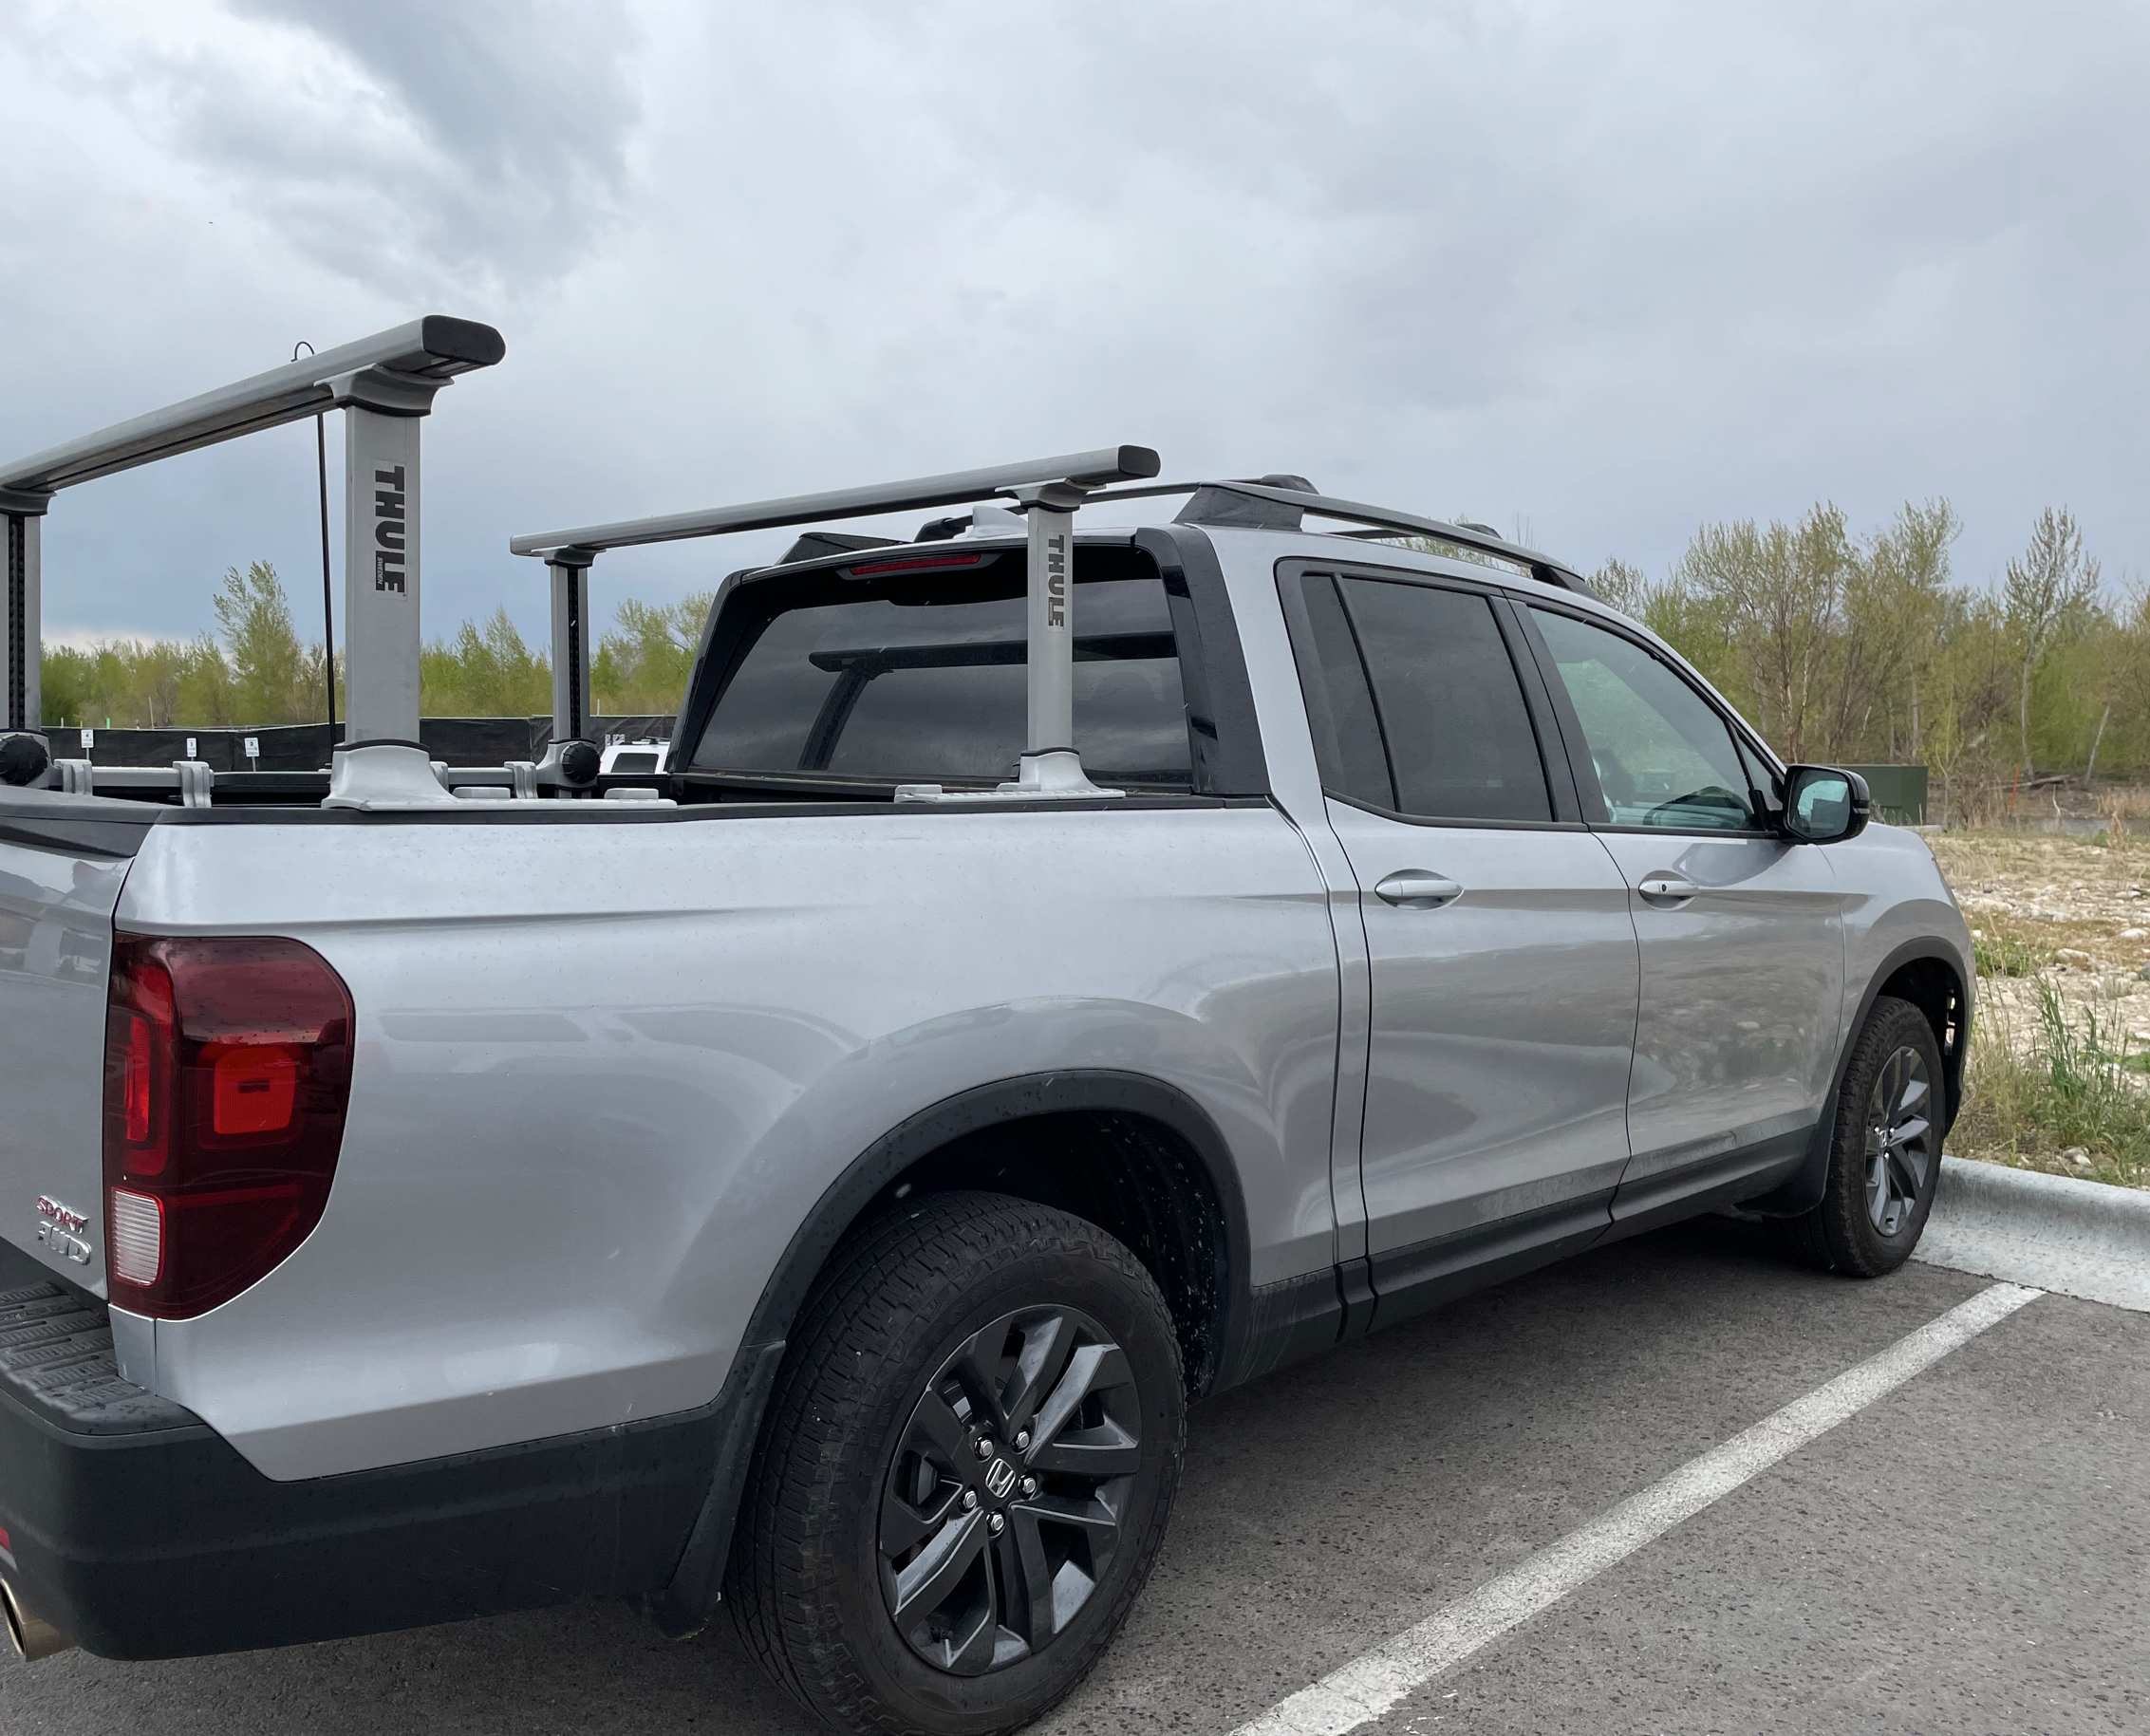
Having completed the previous steps, you can go ahead and install the racks on the truck, that’s it! But if you also have the bed rails, you’ll need to modify them a bit to allow them to fit with the clamps. Here’s what it looks like with both installed:
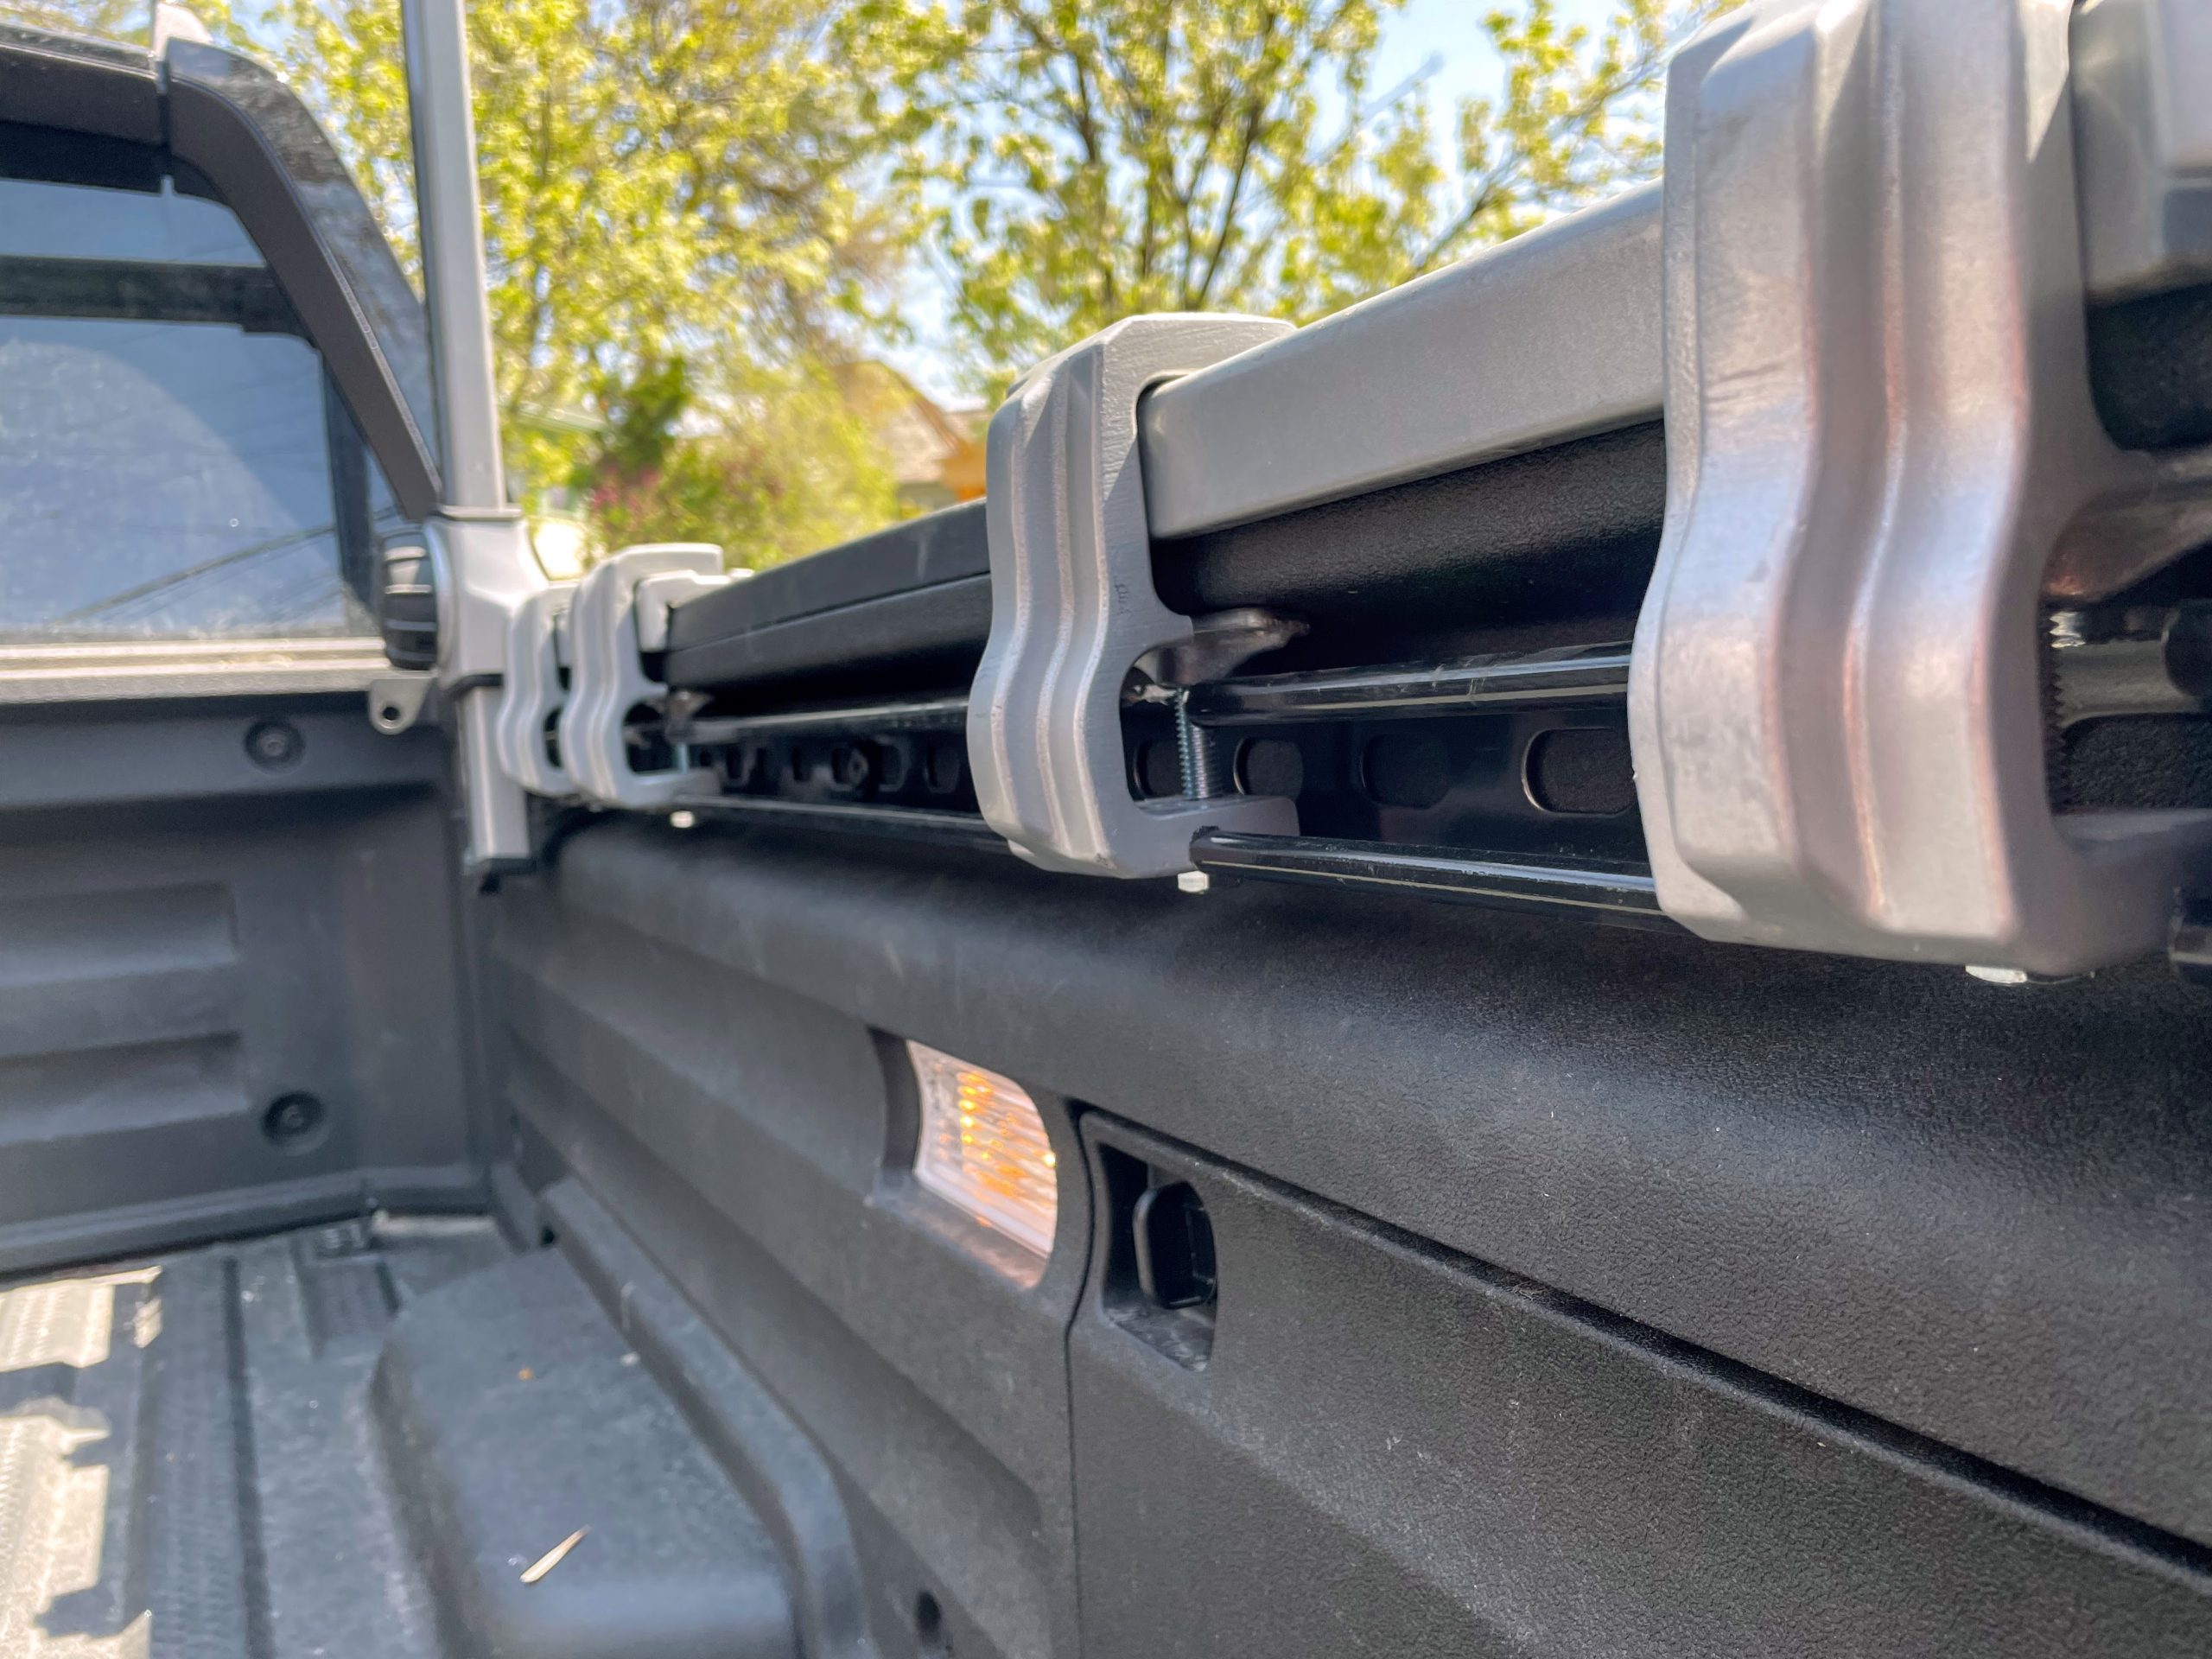
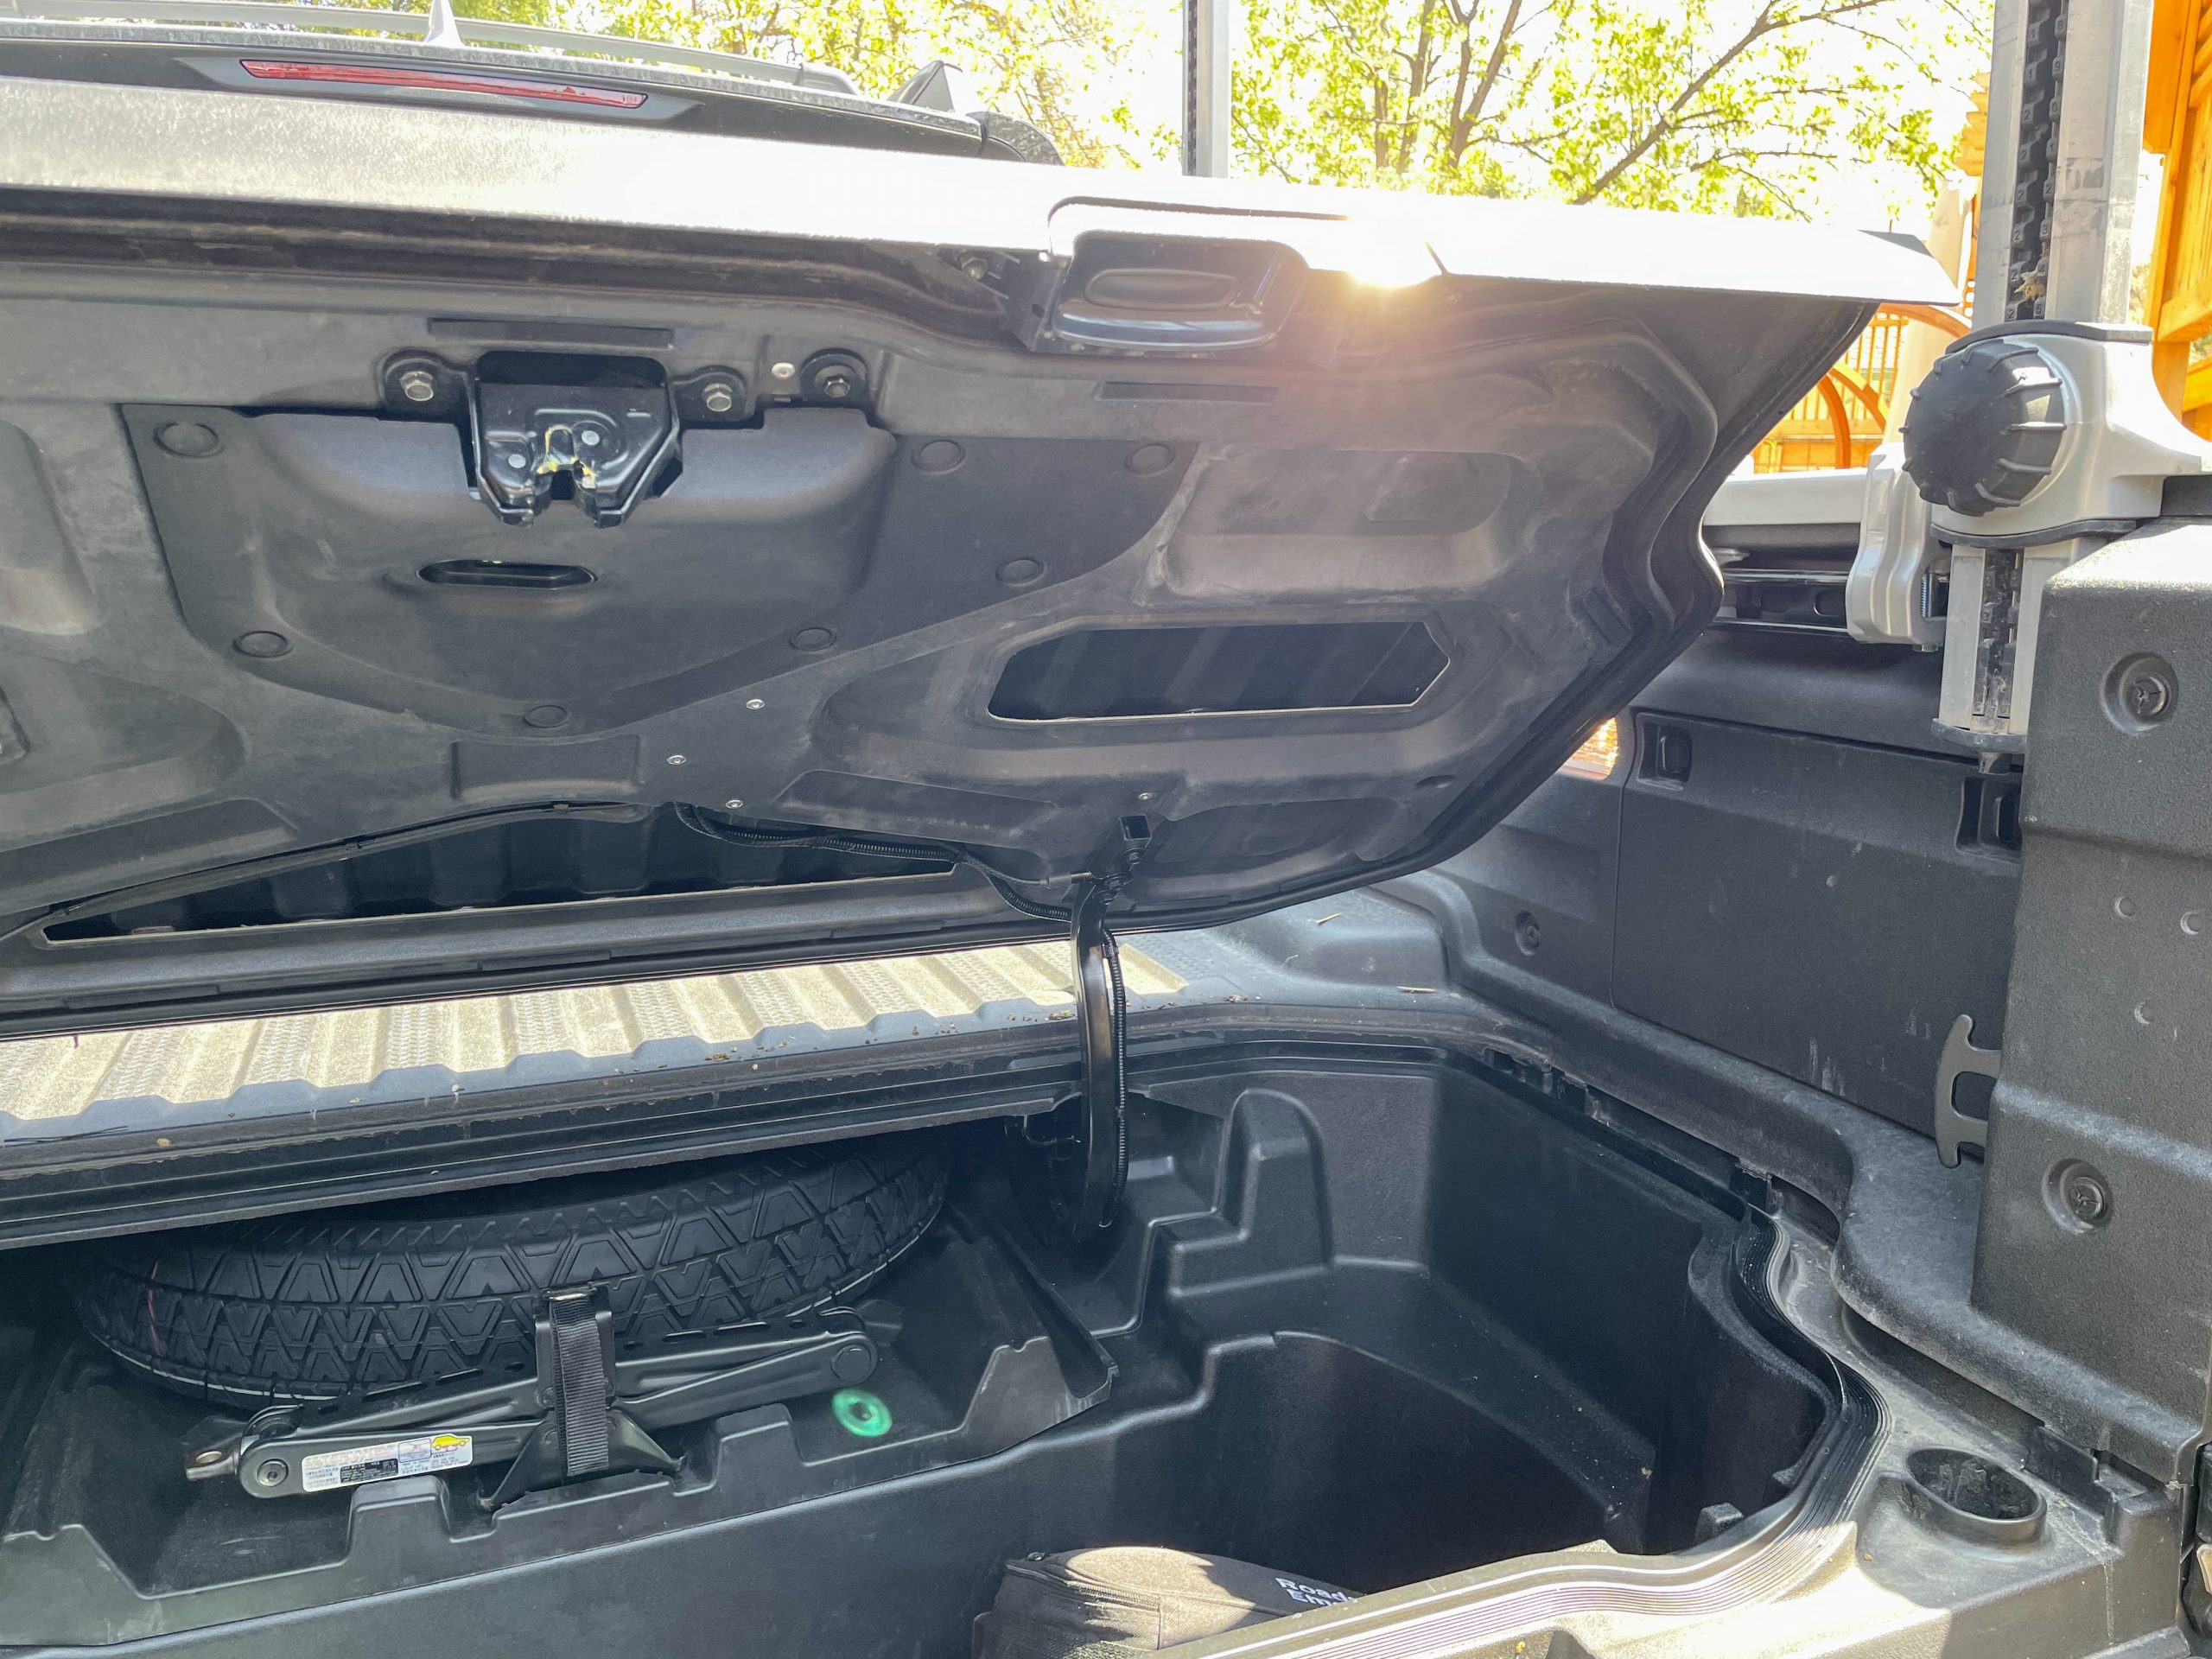
Notice how with the Ridgeline, there is nothing in the way of the adjustable racks – you can go all the way down to the bed floor if you want. At this level, you have total access to the side storage panel too. And they do not get in the way of being able to access the trunk either.
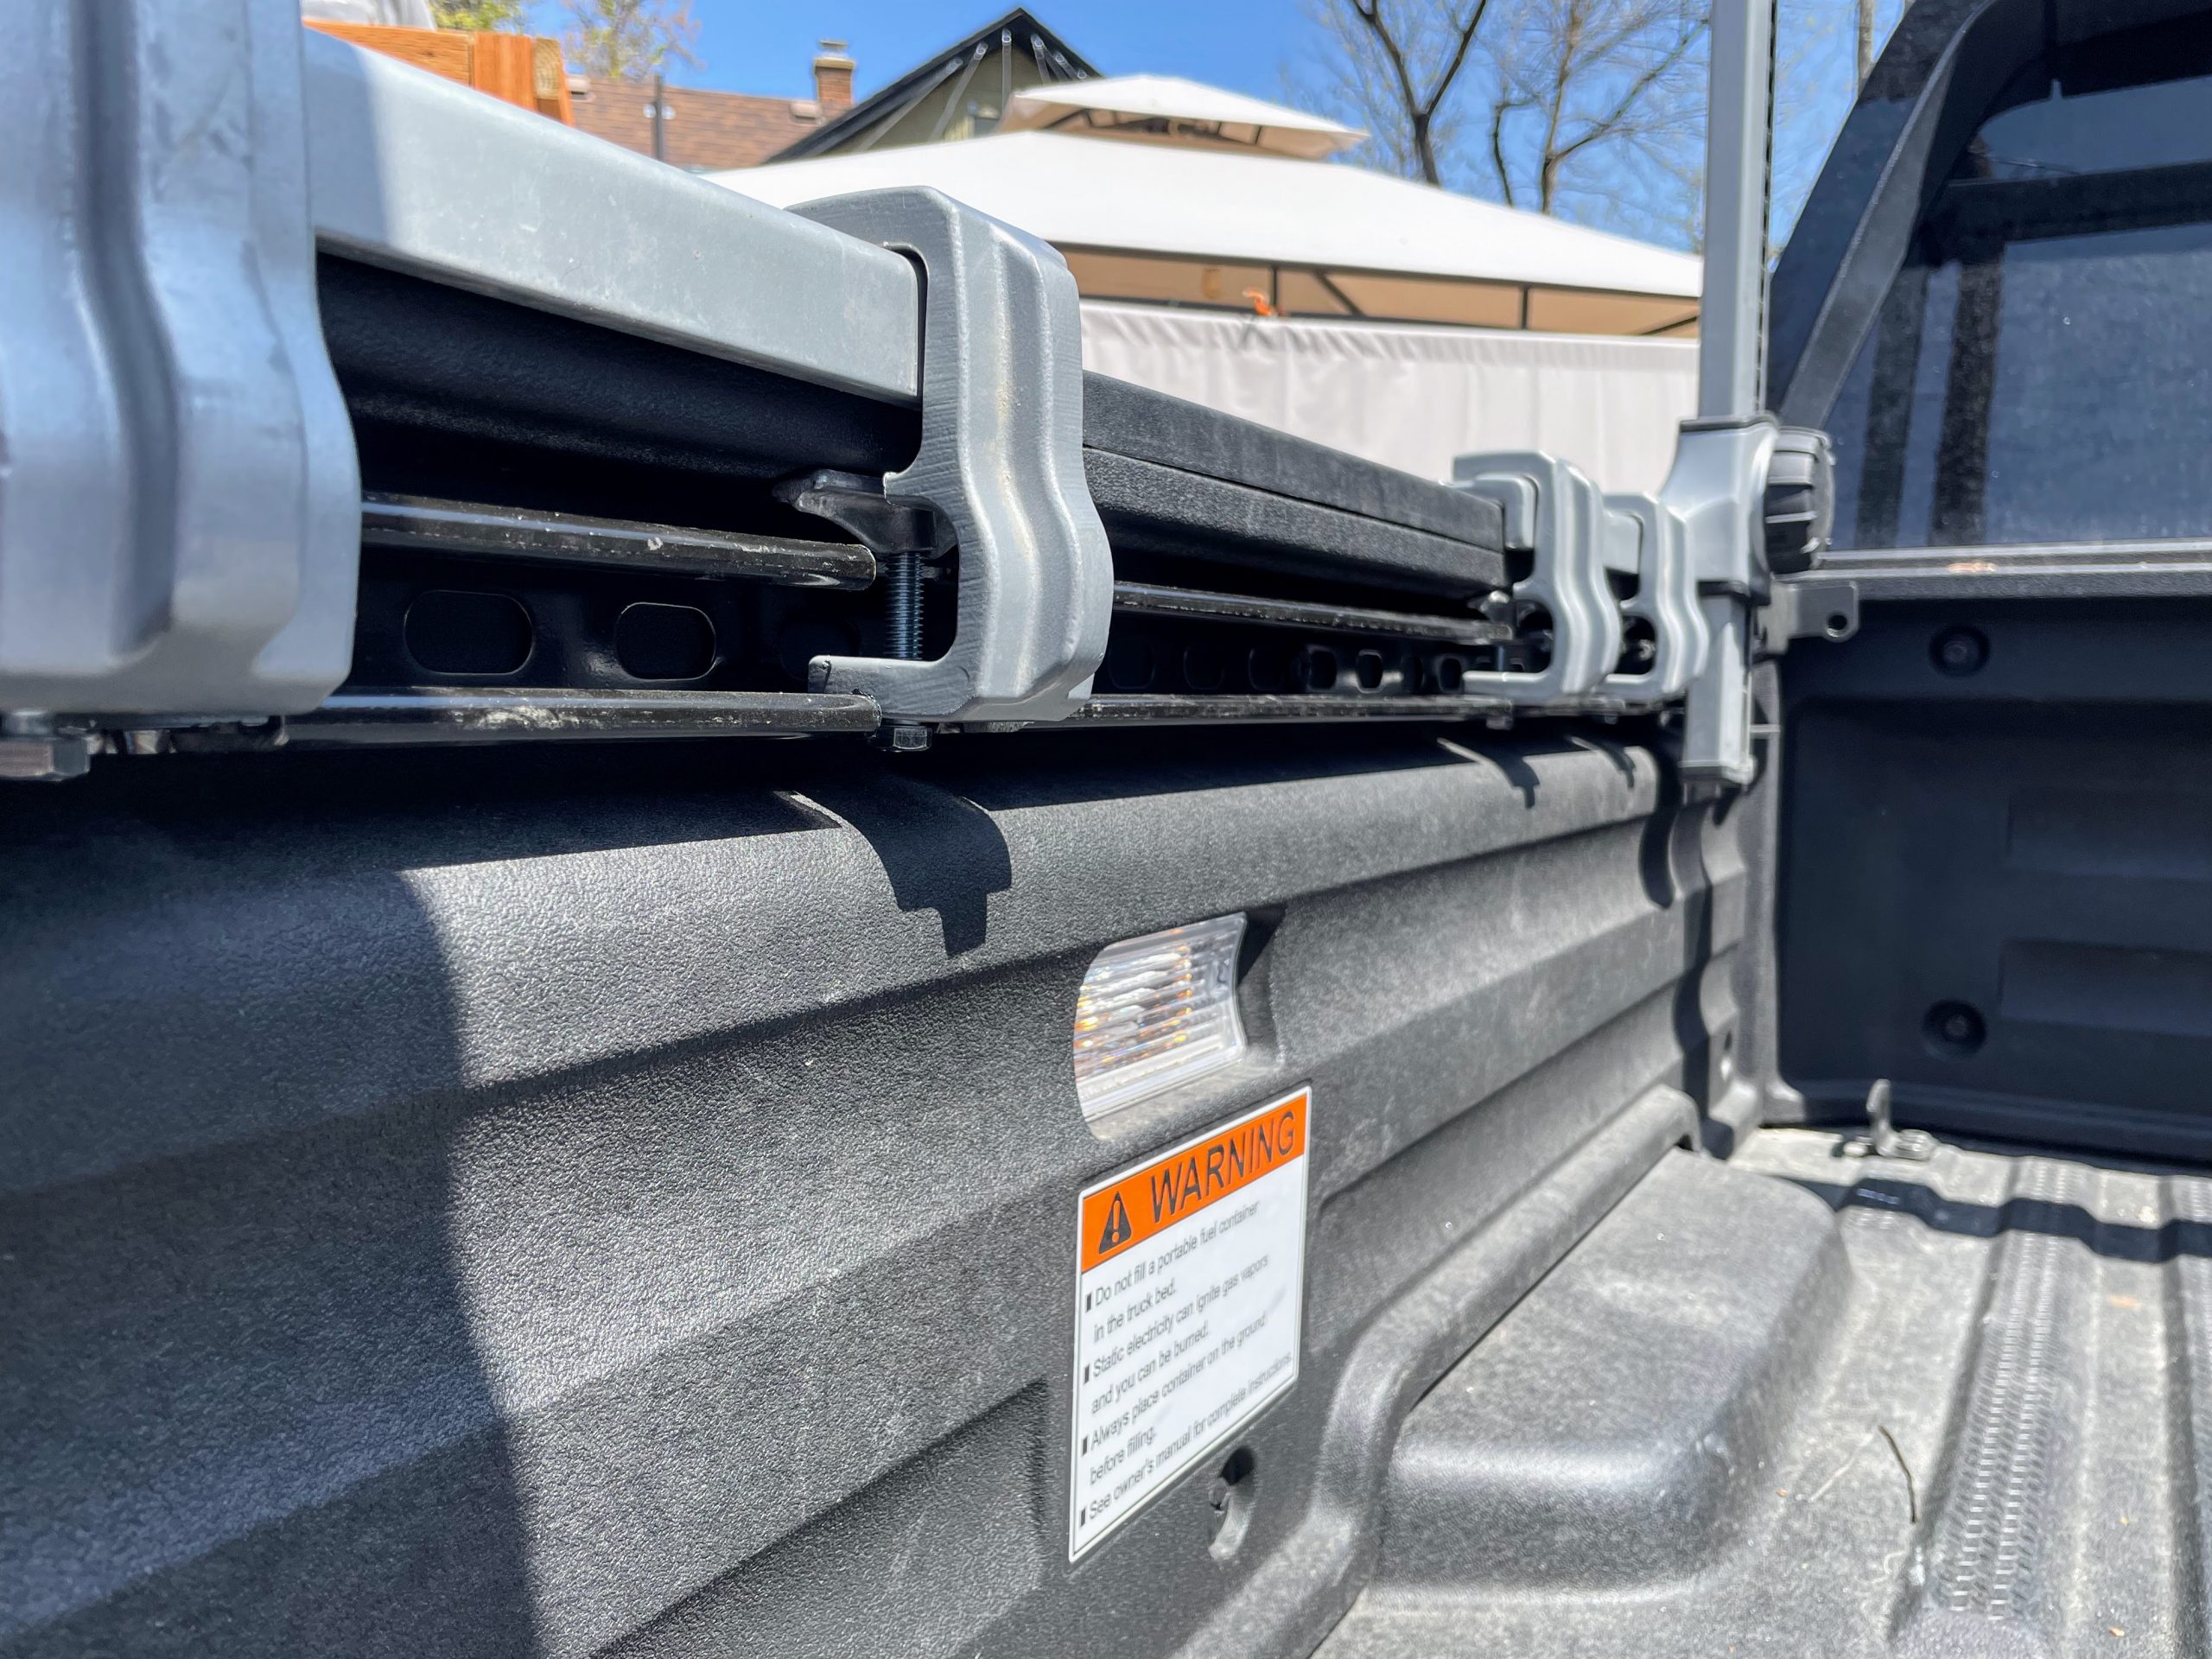
Modifying the bed rail mounts to work with the rack clamps
All you need to do is figure out where you want your rack clamps positioned on the bed, mark where they line up with the bed rails, then cut some chunks out of the rails with an angle grinder/cutoff saw. CampingRandy has a great video of how he installs these, so I followed his instructions and just made some cuts to allow room for the clamps. Mounted, they are still incredibly strong and provides plenty of extra functionality for providing extra tie hooks or mounts.